
As I only need a few more credits to receive my Bachelors degree in Electrical Engineering, I thought I'd take the applied robotics course, where students work in teams of 3 to create a robot to play a game against the other teams by the end of the term. This year's game is Beerpong, and we've been busy trying to come up with the best way to locate the cups and launch ping pong balls accurately.
We decided to go with a pan/tilt design for aiming using NEMA 17 stepper motors that will allow us to attach many different types of firing mechanisms so we can get good test data for different methods as we progress, and chose a standard spacing for the mounting holes to let us fit 80 20 extruded aluminum if we wanted. Our method for locating the cups is to use the (relatively) cheap LIDAR-Lite module mounted to the turret which will scan back and forth, allowing us to find the closest cup. The other teams that we have talked to are all planning on using a webcam or a Kinect camera and OpenCV for detecting the cups, but we would like to avoid the additional complication of using a computer and are opting to instead keep everything on an embedded system (plus the LIDAR-Lite already has example code for the Arduino written for it, which will dramatically cut down on the time it takes to develop the low level code for our system. We chose to run with the Arduino Mega 2560 so we could make use of the existing libraries for driving stepper motors, servos and other modules that we may decide to use (and you can't ever have too many UART channels).

We verified the pan/tilt design by cutting it out of cardboard before moving to acrylic:

The first method is based on designs used by a lot of professionally made ping pong launchers, using some premade motorized wheels for launching hotwheels style cars:
.PNG)
After putting in a solid weekend of work we had a prototype version to test:


Not long after we got that method working we were discussing with another group and found that they were getting more consistent results by simply attaching a fan to the end of their barrel and blowing the ping pong ball through the barrel. We had to test for ourselves, and printed a test adapter to fit a 38mm fan that I had which is an absolute champ for it's size.

Our latest design will involve a revolving set of tubes for holding the 18 ping pong balls we're allowed while keeping us within the 24"x24"x72" size restriction, and we are aiming at getting a finalized design done by the beginning of next week. We have also ordered some polycarbonate tubing to ensure a more consistent inner diameter than the schedule 40 PVC pipe we were using before (and it also has the benefit of being transparent).
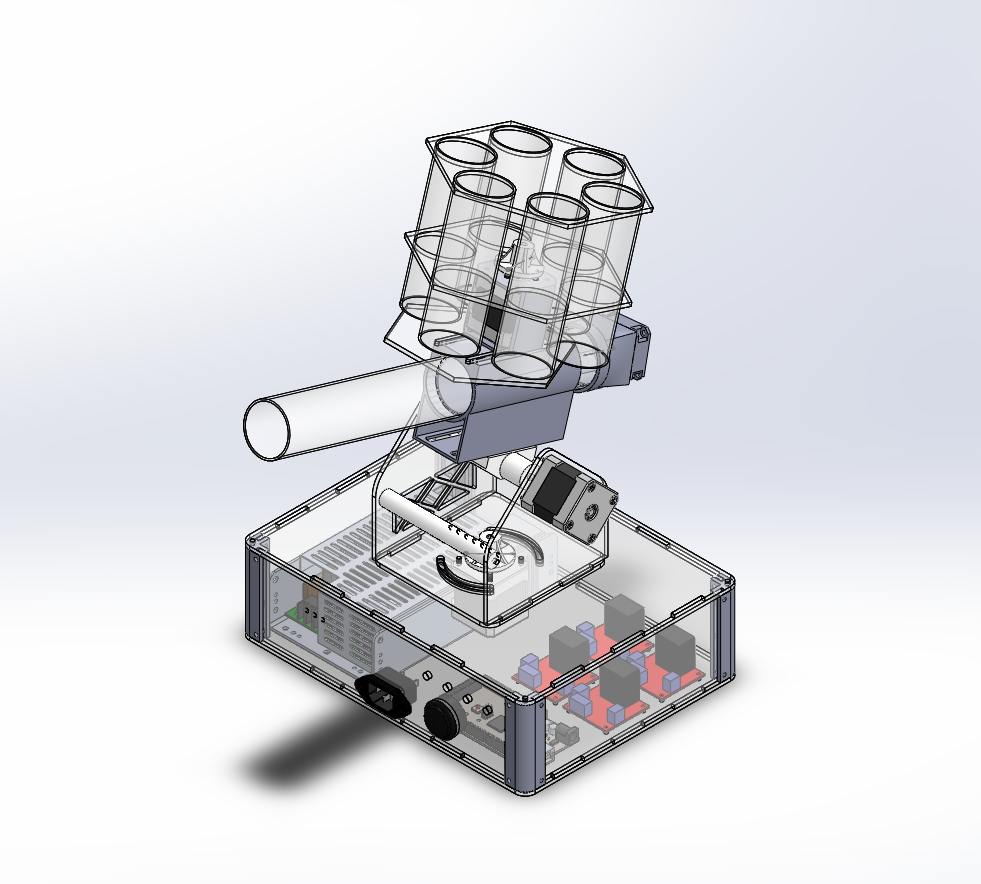

This is the rough approach that we want to go for, we are planning on some improvements over this design including tilting the tubes for the ball holders to a 45 degree angle to make it more compact.
We are almost at the end of the third week of the term, and we will need to have the robot finished for the competition during finals week (week 11).
Update 4/27/2015:
We have been hard at work on the Beerpong robot for my Applied Robotics Class and have gone through a couple of changes in the design.
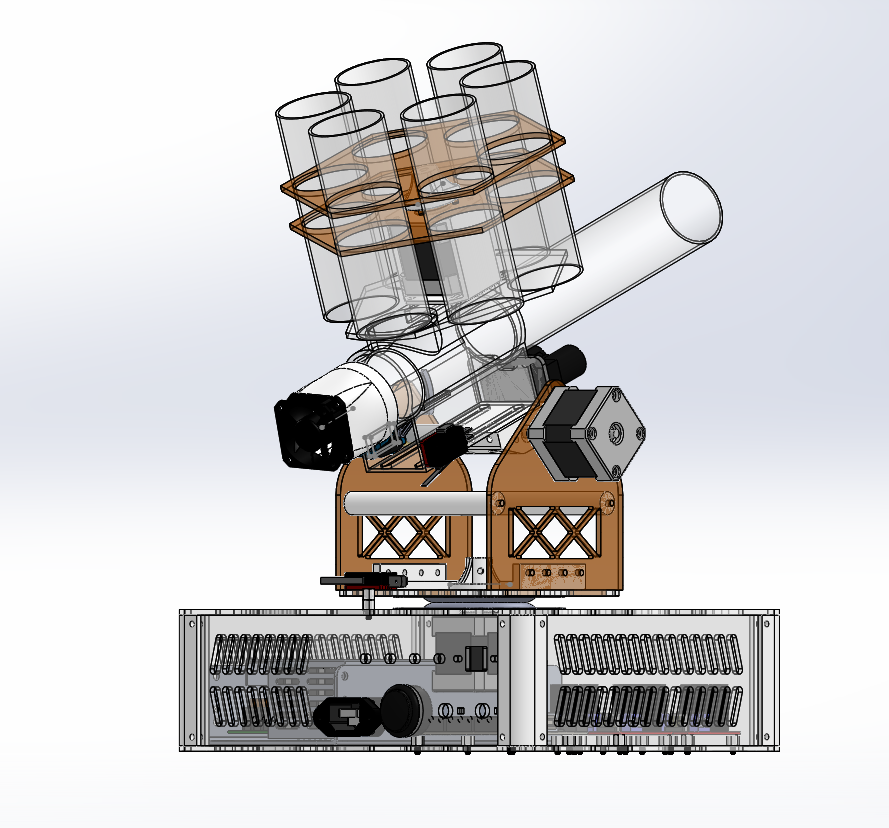
Previously, we had planned on using a gravity fed, revolver style method for loading the ping pong balls into the barrel. But we found that there was a significant loss of power when test firing with the hole on top open, and the robot could only fire a ball halfway across the table at full power to the fan. We considered incorporating a servo actuated lid into the design for the revolver or adding additional "blank" tubes that would act as lids in between the actual tubes, but in the end we decided to go for a different approach, using two tubes that run parallel to the barrel to hold the ping pong balls.


We also did some testing for accuracy, and added a strip of electrical tape to the bottom of the barrel to give the ball some topspin.
After working over the weekend we have most of the mechanical frame assembled, and we verified that we could move the stepper motors and stop them with the limit switches.

.jpg)
Update 5/11/2015:
After spending a lot of time wiring and rewiring the robot, we are getting closer to being completely out of "hardware mode" and can spend more time on the software end of things.
We've added some sensors to the loading system for detecting the position of a ping pong ball, which has made the loading process much more simple to code.


We've also started working on a GUI for displaying data from the robot and controlling it remotely using Python and PyQt.

There's still definitely a lot more work to be done, but things are coming together well right now.
Final Results
At the end of our 10 week robotics class we had a robot that could play beerpong! We placed third at the competition, losing to Team 12: "The Hammer" (1st place) in the quarter-finals and then to Team 7: "ZZZZ Best" (2nd) in the sixth or seventh lightning round of the semi-finals.
The robot performed fairly well minus a few software issues mainly related to IR sensor threshold values used for detecting the ping pong ball's position when reloading not suitable for the outdoor sun and lightning round code that was written hastily and not designed to run for multiple rounds without restarting the robot.

The final loading mechanism used a motorized sleeve that acted as a "sealed" door to keep the airflow through the tube more consistent.


You can watch the video below to see how it performs. We also added a defensive ball swatting unit with an Arduino Uno a couple of days before the competition. It used a speaker taped to the bottom of the playing table as a microphone input and would swing the flyswatter back and forth a few times whenever it detected a ball hitting the table. It was surprisingly effective, and the signal response for a ball hitting the table was much higher than any ambient noise that we didn't have any false triggers furing gameplay.
Wiring Diagram
We chose to use Fritzing to do the wiring diagram for the robot to keep things straight when working on everything (it got to be a bit of a ratsnest sometimes)

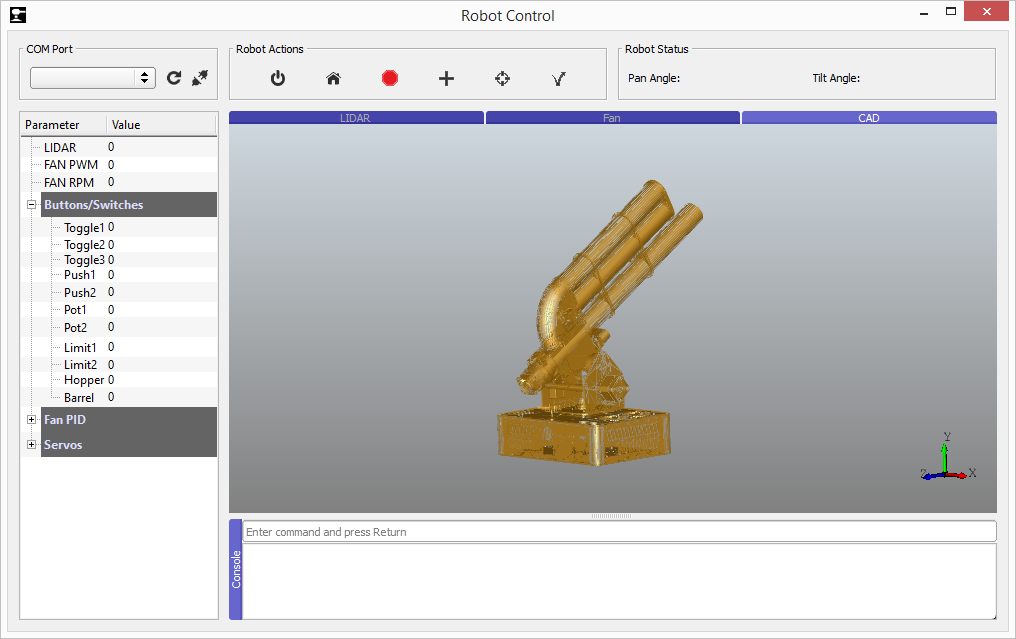
Robot GUI
The GUI was written in Python and allowed for control of the robot and for displaying data from the various sensors such as the LIDAR and the tachometer for the fan.

While we were able to open and view a STEP file of the robot, we took the feature out of the program before it was finished due to a lack of time.
No comments:
Post a Comment